How to install the Nvidia proprietary drivers in LinuxMint
Posted: Fri Nov 23, 2012 5:52 am
If you are having trouble with drivers that are installed using the "Addition Drivers" tool included in LinuxMint, that is when you should try this method, if the drivers installed using that tool work for you, there is no reason to do this. Also if you are an eperiencedlinux user, and want to experiment with the latest Nvidia drivers, then this is for you.
This is for current Nvidia graphics card support only, this will not work for legacy cards.
This also will not work on "Hybrid" (laptops that have both an Intel ow power GPU, and an Nvidia discrete/standard GPU) tose require you to use a seperate method, or change settings in you BIOS
Ok, a lot of people seem to be having major issue getting their Nvidia gfx card drivers installed, so I decided to write up a little tutorial on how to get them installed, and working, the best way that I have found.
1: First, identify you Nvidia card, for me, it's an Nvidia GTX460-OC, so I can use the latest and greatest. Next thing you have to do is go http://www.nvidia.com/content/global/global.php, and select your country/region, for me, it's "USA/Canada". Or, if you like, you can just skip all the crap, and go directly to the drivers download site, which is located here at the Nvidia driver download section. This will bring you to the Nvidia "Manual Driver Search"
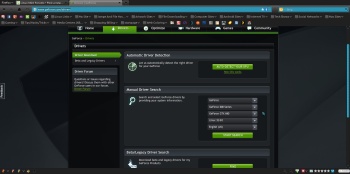
Once you are here, all you have to do is use the dropdown selection to select your card, 32, or, 64 bit Linux, and your language, click on start search, and select the most recent driver for your card. Download the file to someplace easy to get to, I would recommend downloading it to your users home folder, (/home/<your_user_name>), as you're going to have to get to this folder from a command line.
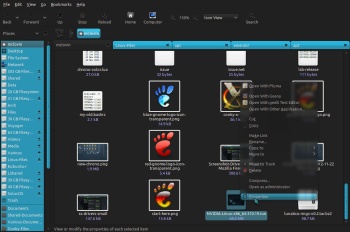
2: Once you have the driver downloaded you need to make it executable, to do this, just right click on the file, and select "properties"
this will open the properties dialog window, once that window is open, go to the "permissions" tab, and click to add a "check mark" to the "Allow executing file as program"
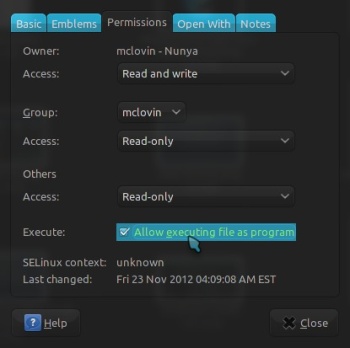
This is going to allow you to execute the installer. At this point, I would also recommend renaming the file to something that is both easy to remember, as well as type into a command, I personally usually rename it to n.run, you can rename it to whatever you like.
3: Now this is where things start to get slightly more difficult, but don't worry, it's really not that complicated at all, but from this point on I am not going to be able to show you screen shots due to the fact that the rest of the install has to be done in in a command line interface. To get to a cli, (command line interface), all you have to do is press ctrl+alt+f1 at the same time, this will take to what is called "tty1", once you are there, you will see something telling you to login, you can easily login as your normal user, just type your username, hit anter, and then it will ask you for your password, enter it, and press enter, and then you will be logged in.
4: Now that you are logged in, you have to shut down the Display Manager. If you are using a recent version of LinuxMint, such as Mint 14, you are most likely using MDM, or Mate Display Manager, (if you're using KDE, then you're most likely using kdm, or K Display Manager), for this tutorial, we will be using MDM. Now, to shutdown mdm, you ust have to enter the command this will shut down MDM, and you can now go on with beginning of the driver install.
5: Now you have to go to the directory where you downloaded the driver, if you downloaded it to your users home folder, you are already there, so you can go on the next step, however, if you downloaded it to someplace else, you need to "CD", or change directory, to where you downloaded it, so if you downloaded it to say /home/<your_username>/Downloads, then you would issue the command remember that the directory names are case sensitive.
6: Now we need to start the install, to do this we issue the command to run the Nvidia driver installer, for this tutorial we are going to use the name that I showed you earlier, "n.run", if you named it something else, you would use that name in place of it. The command you need to run is
Again, remember that the names are case sensitive. Once the installer starts, you will be given a license agreement, use you arrow keys to select "Accept", and hit enter. At this point you are going to see some things about modules and other messages, just select "yes" or "continue" or whatever it is asking you do. Now things start to get interesting, because Mint, and most other distros come with the free open source nouveau nvidia driver, it has to be blacklisted before you will able to install, and use the Nvidia driver, but the Nvidia driver installer has a nice little feature, it will try to do it for you, and it will ask if you want it to do so, select yes, and it should take of it for you. Unfortunately, at this point you need to reboot, so that the system can unload the nouveau nvidia driver module from the kernel, which will allow you to continue, so reboot the system, and when it comes back one, one of two things will happen, either you will 1: be in a cli with a login prompt, or 2: be in a low graphics mode, in which case, you will need to hit ctrl+alt+f1 at the same time to get to tty1, and then login there. Either way, you are going to have to once again shut down MDM by issuing the command
now that all that is done, we can get on with the actual install of the driver.
7: Now that the nouveau nvidia driver module has been blacklisted, and everything is ready, you will once again go to the directory where you downloaded the driver by following the instructions outlined earlier in the tutorial. Once there, you will once again issue the command to start the driver install. Again you're going to go through the install using the arrow keys to select Accept to the license agreement, and continue, and follow the instructions, and the driver will install. Now that the driver is installed, there is one more step before your driver will be ready to work on your system.
8: Now that the driver is installed, you have to configure the system to use the driver, luckily, once again, Nvidia has a tool to do this for you. At this point you need to issue the command
this will create a /etc/X11/xorg.conf configuration for the system to use, that tells the system to use the Nvidia driver you just installed.
9: Now that all this is complete, just issue the command to start your display manager once again,
This will start your display manager, and, if everything went as it should have, you will be presented with your login screen, allowing you to login to your desktop, with full hardware accelerated 3D support for your full enjoyment. 
This is for current Nvidia graphics card support only, this will not work for legacy cards.
This also will not work on "Hybrid" (laptops that have both an Intel ow power GPU, and an Nvidia discrete/standard GPU) tose require you to use a seperate method, or change settings in you BIOS
Ok, a lot of people seem to be having major issue getting their Nvidia gfx card drivers installed, so I decided to write up a little tutorial on how to get them installed, and working, the best way that I have found.
1: First, identify you Nvidia card, for me, it's an Nvidia GTX460-OC, so I can use the latest and greatest. Next thing you have to do is go http://www.nvidia.com/content/global/global.php, and select your country/region, for me, it's "USA/Canada". Or, if you like, you can just skip all the crap, and go directly to the drivers download site, which is located here at the Nvidia driver download section. This will bring you to the Nvidia "Manual Driver Search"
Once you are here, all you have to do is use the dropdown selection to select your card, 32, or, 64 bit Linux, and your language, click on start search, and select the most recent driver for your card. Download the file to someplace easy to get to, I would recommend downloading it to your users home folder, (/home/<your_user_name>), as you're going to have to get to this folder from a command line.
2: Once you have the driver downloaded you need to make it executable, to do this, just right click on the file, and select "properties"
this will open the properties dialog window, once that window is open, go to the "permissions" tab, and click to add a "check mark" to the "Allow executing file as program"
This is going to allow you to execute the installer. At this point, I would also recommend renaming the file to something that is both easy to remember, as well as type into a command, I personally usually rename it to n.run, you can rename it to whatever you like.
3: Now this is where things start to get slightly more difficult, but don't worry, it's really not that complicated at all, but from this point on I am not going to be able to show you screen shots due to the fact that the rest of the install has to be done in in a command line interface. To get to a cli, (command line interface), all you have to do is press ctrl+alt+f1 at the same time, this will take to what is called "tty1", once you are there, you will see something telling you to login, you can easily login as your normal user, just type your username, hit anter, and then it will ask you for your password, enter it, and press enter, and then you will be logged in.
4: Now that you are logged in, you have to shut down the Display Manager. If you are using a recent version of LinuxMint, such as Mint 14, you are most likely using MDM, or Mate Display Manager, (if you're using KDE, then you're most likely using kdm, or K Display Manager), for this tutorial, we will be using MDM. Now, to shutdown mdm, you ust have to enter the command
Code: Select all
sudo /etc/init.d/mdm stop5: Now you have to go to the directory where you downloaded the driver, if you downloaded it to your users home folder, you are already there, so you can go on the next step, however, if you downloaded it to someplace else, you need to "CD", or change directory, to where you downloaded it, so if you downloaded it to say /home/<your_username>/Downloads, then you would issue the command
Code: Select all
cd /home/<your_username>/Downloads6: Now we need to start the install, to do this we issue the command to run the Nvidia driver installer, for this tutorial we are going to use the name that I showed you earlier, "n.run", if you named it something else, you would use that name in place of it. The command you need to run is
Code: Select all
sudo ./n.runAgain, remember that the names are case sensitive. Once the installer starts, you will be given a license agreement, use you arrow keys to select "Accept", and hit enter. At this point you are going to see some things about modules and other messages, just select "yes" or "continue" or whatever it is asking you do. Now things start to get interesting, because Mint, and most other distros come with the free open source nouveau nvidia driver, it has to be blacklisted before you will able to install, and use the Nvidia driver, but the Nvidia driver installer has a nice little feature, it will try to do it for you, and it will ask if you want it to do so, select yes, and it should take of it for you. Unfortunately, at this point you need to reboot, so that the system can unload the nouveau nvidia driver module from the kernel, which will allow you to continue, so reboot the system, and when it comes back one, one of two things will happen, either you will 1: be in a cli with a login prompt, or 2: be in a low graphics mode, in which case, you will need to hit ctrl+alt+f1 at the same time to get to tty1, and then login there. Either way, you are going to have to once again shut down MDM by issuing the command
Code: Select all
sudo /etc/init.d/mdm stop7: Now that the nouveau nvidia driver module has been blacklisted, and everything is ready, you will once again go to the directory where you downloaded the driver by following the instructions outlined earlier in the tutorial. Once there, you will once again issue the command
Code: Select all
sudo ./n.run8: Now that the driver is installed, you have to configure the system to use the driver, luckily, once again, Nvidia has a tool to do this for you. At this point you need to issue the command
Code: Select all
sudo nvidia-xconfig9: Now that all this is complete, just issue the command to start your display manager once again,
Code: Select all
sudo /etc/init.d/mdm start